How to make a custom DJ-Booth
Disclaimer, I'm writing this as if it is current, but it's been a while since I've build this booth. I recently found the pictures and I thought I'd share 🙂

What do I want?
I had hauled all my gear back and forth too many times, and I want an all-in-one solution. I'm no upscale DJ by any means, so it has to look nice and tidy, but it doesn't have to win awards.
Set-up time is extremely important. I'm aiming to be ready to go within 30 minutes of arrival and ready to leave within 30 minutes after the party ends, and that includes loading and unloading.
Challenge accepted!

What did I have?
This is what I had before I started building my own DJ booth. It is the American DJ MTS-4 DJ booth. It comes with overhead lighting stands that I had discarded before, but as you can probably guess I wasn't too happy with the frame either.
Let's get started
Step 1: Design
I started with a rough design. As you can see I deviated quite a bit through the building process, but it really helps to have some direction.
I had to change quite a couple of things to be able to fit it in my car, which was really a quite serious constraint. I ended up changing cars, but that's a story for a different day!
I created this model in Sketchup, I believe there are still free versions out there. If you want a clear tutorial on how to use Sketchup, Steve Ramsey has a great (non-DJ related) tutorial.


Step 2: Start building
At this point most of my originals plans had been discarded, which made life a bit harder (do as I say, not as I do). I decided to build a frame from MDF and construction lumber, rather than the heavier rough pine board that I envisioned before.
I created two levels from MDF and a frame of 44*44mm pine lumber (2x2's for those in freedom units). The level would house all the gear I used to carry, the top level would house the gear I use while gigging.
I reinforced the corners with metal brackets. In hindsight the 69*44mm lumber (2x4's) would have been stronger, but what did I know.
I added beams through the middle to make sure it wouldn't bow. That was a wise decision, because I went on to fill it with a ton of weight.
Step 3: Make it mobile
I'm a mobile DJ, so this thing has to become mobile ASAP. I'm using two moving casters with breaks, and two rigid casters. This way a single person can handle moving the booth on a tilted road. I've lost a subwoofer to a slanted road and a river before, this wasn't going to happen to this DJ booth.
Anyway, I digress. I coated the bottom panel in paint, because MDF has a notorious bad time dealing with water. Plywood is a bit better, but I'd still paint it.
I put on the casters, added a plywood panel to the bottom level and called it a day. We now have a movable object.
Let's call it minimalism I guess 🙂


Step 4: Close it up
An "Open-concept" DJ booth might have some value to someone, but it wasn't what I was looking for, so I had to close it up. I added plywood sheets to three of the sides. I had these pre-cut at the store. They are usually able to cut sheets up to within an acceptable margin for you. My store could even do custom work, but I didn't need it for this.
At this point I wanted to see what my gear would look like. I have a DDJ-SX2 and I had an all-in-one touchscreen PC to control my lights. If you're considering the same: DON'T! All-in-one PCs are not made to be rolled around all the time. I think it survived 5 gigs untill it started having memory issues. I switched to LightRider with an iPad and I haven't looked back since.
If you're set on a PC, get a touchscreen laptop. They can handle a bit more, and they aren't as susceptible to power outages. I used Chamsys as the control software (and I still have it as a back-up).
Step 5: Make it pretty
Okay so this plywood monstrosity will probably work fine, but it looks like I've spent exactly two minutes on it. This thing has to stand up to a ton of drunk people, so I decided to cover it with laminated flooring. Why you ask?
Laminate flooring doesn't move and bow as much as regular wood, it's way more resistant to damage and it's pretty waterproof. It looks quite decent in my opinion, so it's what I'm going with!
I don't really have any good pictures without revealing the next step, so I'm going to keep you in suspense a bit...


Step 6: It's gear time!
It's finally time to add the gear! This is what makes this weird box on wheel into a DJ booth. I've created a top plate with a cutout for my DDJ-SX2 and my all-in-on PC. Cables will be running underneath the top plate, and they will run down the sides or up to the laptop through dedicated holes.
While doing this I've also added edge trim, made from pine corner pieces and paint. These ended up being more vulnerable that I expected, so try to find something stronger than pine.
Step 6: V1 is ready!
That's DJ booth V1! Everything is pre-wired and working perfectly. Time to take it out gigging!
I got covers for my speakers and my booth from a semi-local supplier (Luidsprekerhoezen.nl for those in the Netherlands). I can fit my full-range speakers and all cables in the booth during transport, and my subs are on casters so I don't have to carry anything anymore. Load out takes max. 5 minutes by myself.

")


BONUS STEP: Updates
You can't get it right the first time, so I made some upgrades along the way. This is what I've changed over time:
- Skip the all-in-one PC and switch to an iPad with Lightrider. The iPad is way more reliable, and Lightrider is really easy to use. I've built the DMX interface into the booth, and I pre-wired the power cable for the iPad. Fully plug and play!
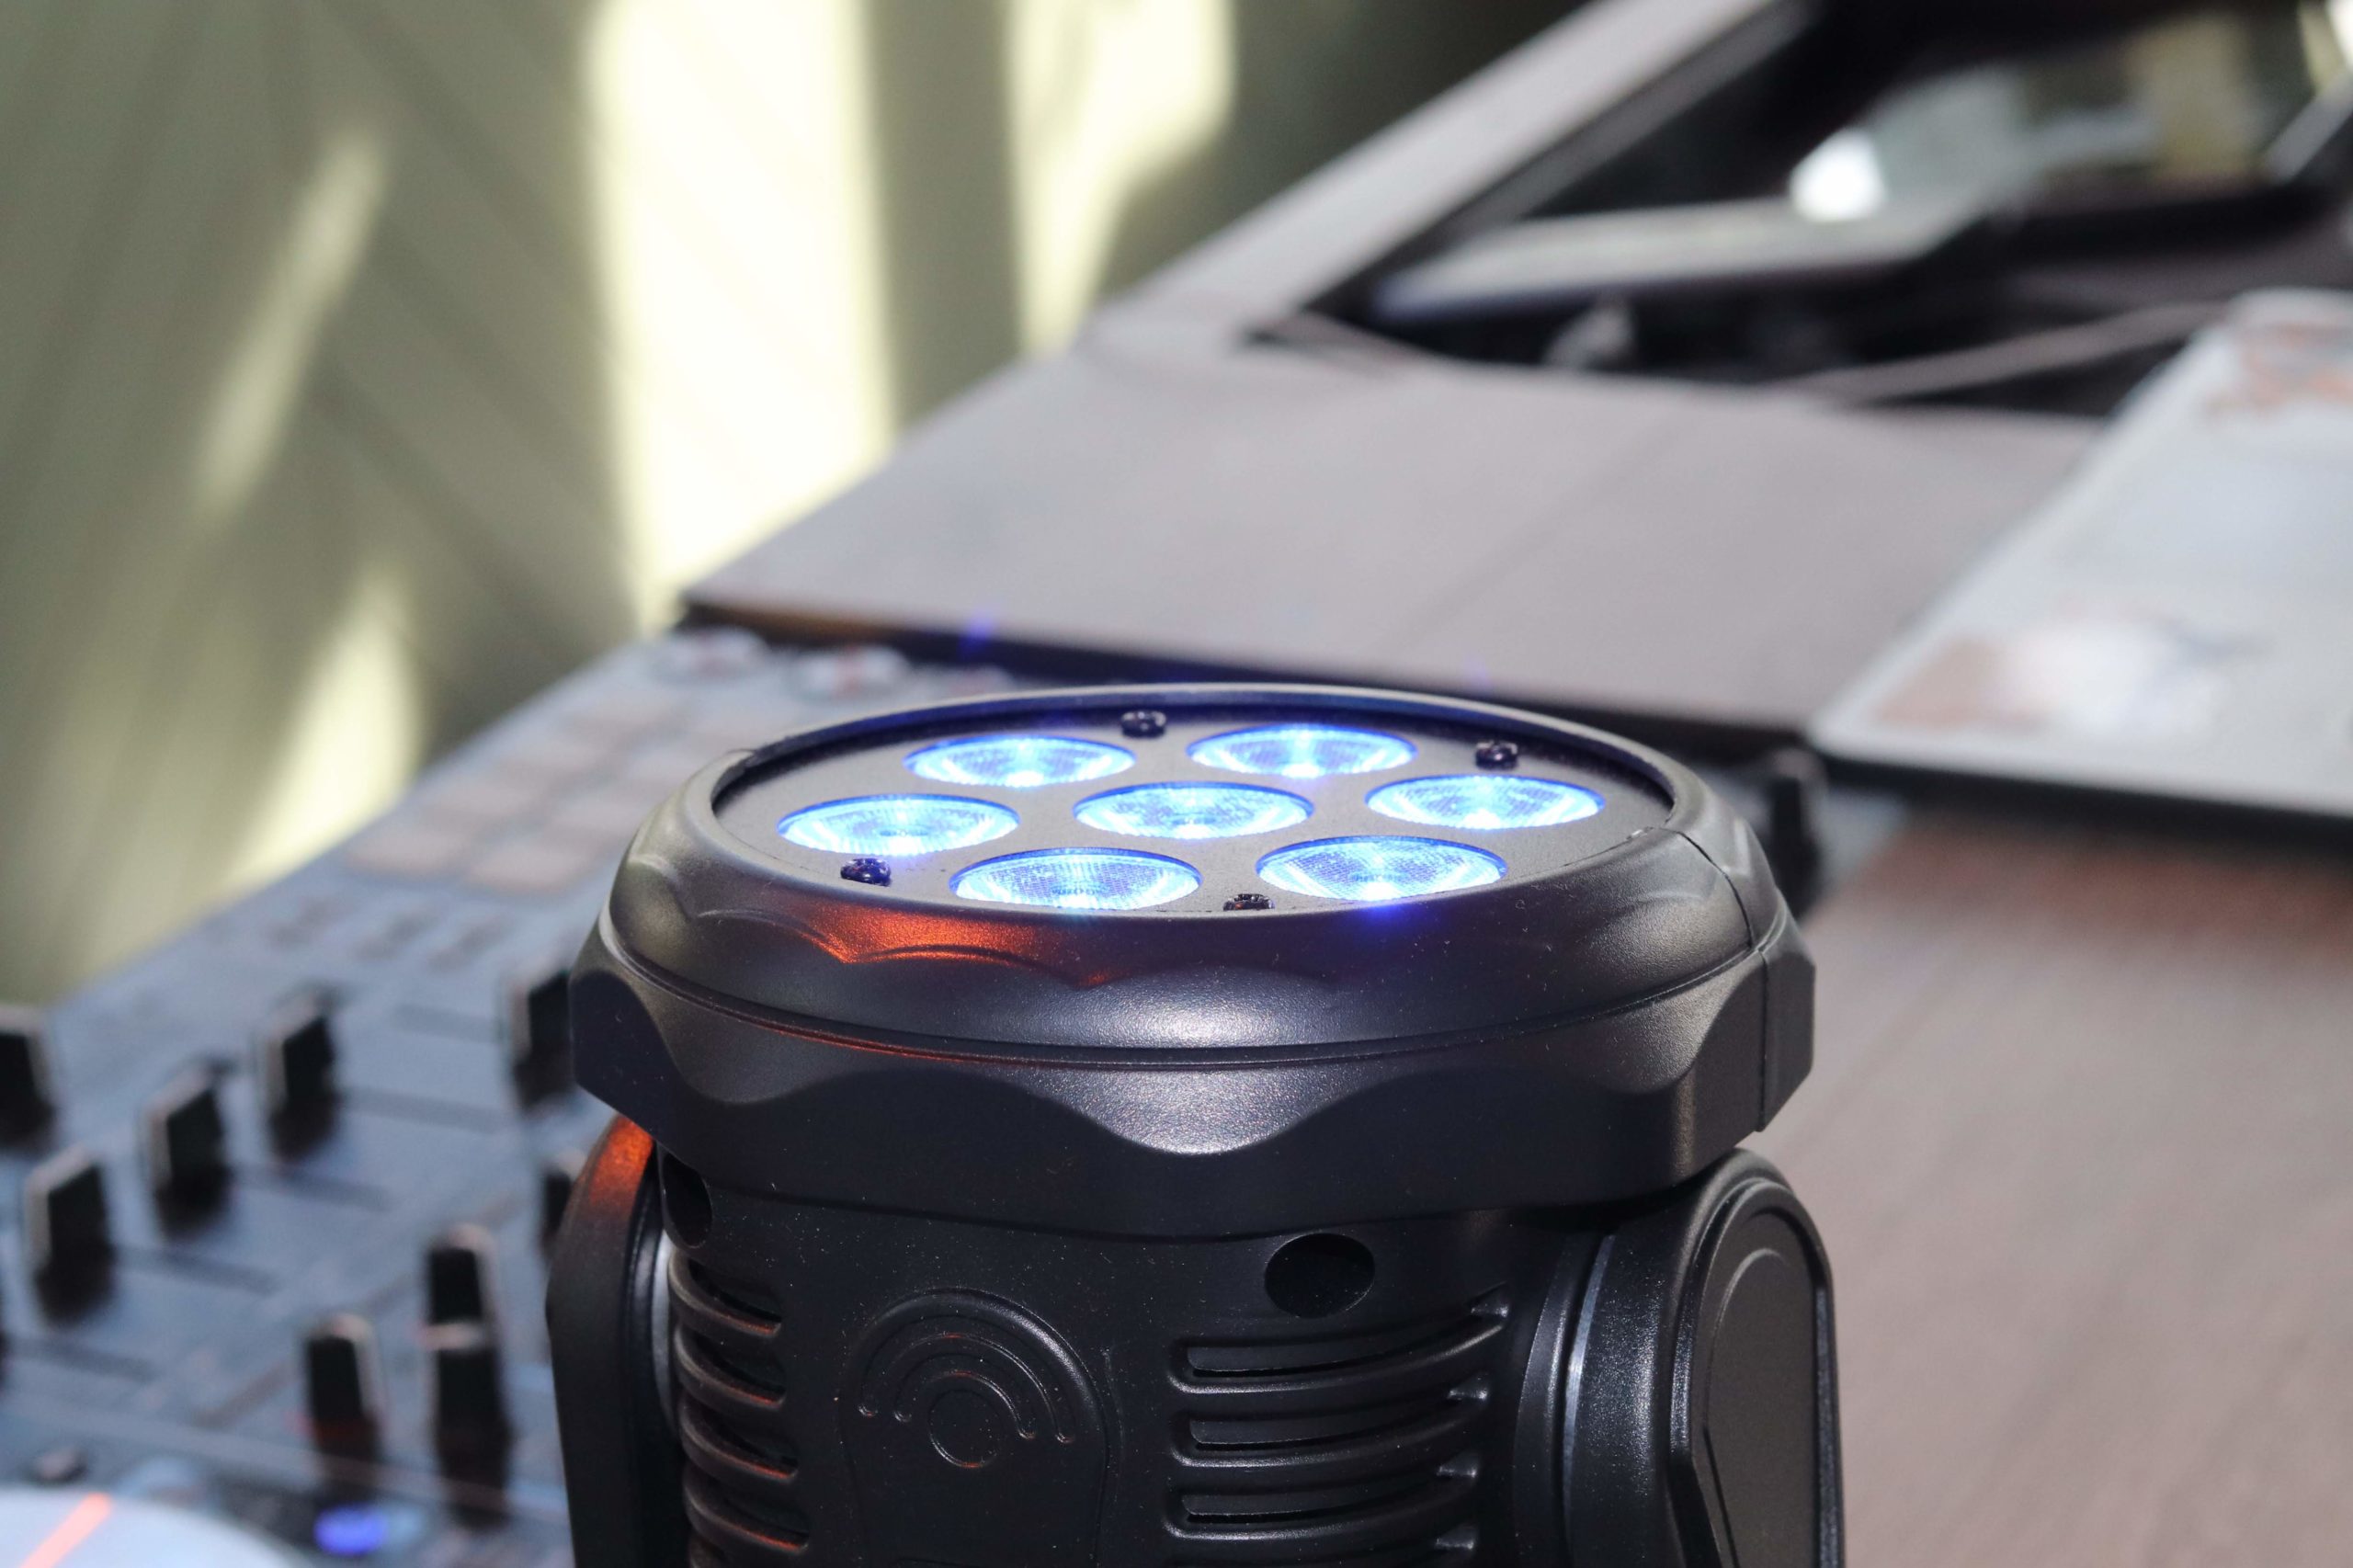
- Add some lights; I've added two movingheads to the corners of the booth. They're both pre-wired with power and DMX cables. Just plug 'm in and they'll play nice with the rest of the lights.
- Add a patch-panel; I started out with cables dangling in the bottom of the booth, and I got sick of that really quickly. I added a standard 19" patch panel with power input, two power outputs, sound outputs and DMX output.
- Built-in microphone; I added a wireless microphone receiver to the thing. Gone are the times that my microphone cable messes with my faders 🙂
- UPS; Lastly I added an uninterruptible power supply. This device makes sure my booth keeps power, even if a breaker trips. Losing power can really mess with your gear, and this is a way to avoid that!
What did you build?
I'd love to see all your designs, because I there are definitely more ways to improve this idea! I'm keeping an an eye on the comments, and I'm happy to help wherever I can.
Have fun making some noise!
Facebook Comments